Tuesday, September 20, 2016

The Mount Etna Summit Hike from Rifugio Sapienza

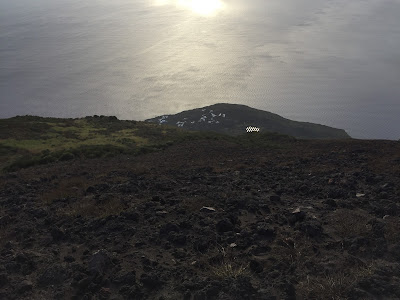
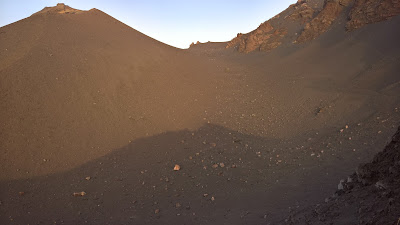
Left: Hiking route to Mount Etna summit from south side. Right: View of main crater of Mount Etna.
Hiking route to Mount Etna summit from south sideView of main crater of Mount Etna

Hike Notes

Length: 8.4 km (5.2 miles)
Duration: 5.5 hours
Elevation: Min elevation 2.497 m (8190 ft), max elevation 3.253 m (10,672 ft)
Location: Italy, Region of Sicilia, Province of Catania, Etna, Nicolosi Nord

Overview

During Christmas 2001, we were in Taormina, Sicily for a few days. One clear and sunny day, we decided to see if we can get to the top of Etna. Ha, ha, ha – so unprepared we were. We drove to Piano Provenzana on the north side of Etna and just started walking around. We were nowhere near the summit before cold and wind forced us back down the hill to Taormina. That half-hearted attempt haunted us for 15 years. Well, this year we finally got a chance at redemption.

This time around, we prepared and realized that you actually need a guide to go to the summit; you don’t just go up on your own. So on another clear and sunny day – this time in early autumn – we made our way to the Rifugio Sapienza on the south side of Mount Etna. There are different routes and guide services you can use to get to the top. We decided that for us it would be the easiest to join a group at Rifugio Sapienza. The guide hut where you can join a tour is located next to Rifugio Sapienza and is signed Gruppo Guide Alpine Etna Sud.
Aside: If some guy tells you where to park when you reach the rifugio and expects a tip, you can give a little something if you are felling generous, like 1 €. The idea is that he “watches” your car. It’s a scam. He makes a show of putting a blank ticket on your windshield, but it means nothing since parking is free. When we returned from hiking he was nowhere to be found. So much for watching our car.

As described on the Gruppo Etna Guide site, there are a couple of tours (escursioni) offered. We opted for the crater summit (i crateri sommitali) tour lasting 5-6 hours and requiring trekking abilities of medium to expert. Expert is a bit of stretch: it wasn’t that hard, but you need to be prepared and in reasonable shape with the right gear. Of course, there are many opportunities to buy gear and even borrow it on the spot. For example, from the guide hut you can borrow shoes and jackets and poles. And, as you make your way up there will be purchasing opportunities for hats, gloves, jackets and more.

We went on the group tour. We didn’t explore options for a private tour (like we did in Stromboli), so we arrived at the Guide Hut and signed up. It seems like they try to keep the size of the groups reasonable, around 20-25. It’s first come, first served. The earlier you arrive, the sooner you go up. You should definitely arrive before 9:30 am according to the email we received when we asked for information.

We arrived around 9:00 am and there was already one group ready to go up. We joined the next group. It cost 85 € a person. Our guide (Salvo – really good) spoke in English, Italian, and French so explanations came in triplicate. The whole tour lasted about 5.5 hours. Salvo herded our group on to the funivia, and then on to a bus so we stayed together. After the bus, we started the walk.

In terms of gear, we brought our normal hiking stuff: boots, poles, several layers. Some folks in our group were wearing low cut, sneaker-type shoes. Some didn’t use hiking poles at all. Just depends on what you are comfortable with. We saw a group of volcanists on a different tour, and a few were wearing pretty serious gas masks. I found the gas at the main crater at one point to be very strong and had a handkerchief over my nose. Not sure if it helped. You could bring a simple respirator or dust mask. Or better yet, you can always descend 10-20 feet to get out the way of the gas.

The route to and around the top crater depends on the weather. We had a clear day (40 F and sunny at the top) with winds more or less cooperating so that we could walk along the rim and clearly see all the colors of the crater that our guide said are usually hard to see. At times, we waited for a few moments to cross a section of the rim to avoid gas blowing across our path, and then we dashed across.

Aside: I thought it strange that one couple brought a medium sized dog on the hike. The dog was extremely well-behaved but seemed a little out of its element. At times the owners had to carry the dog across gas vents or ground with sulfur deposits. Our guide said that the sharp-edged volcanic rock can be hard on a dog's paws.

The funivia and bus ride takes visitors (including our group) to approximately the 3000 m point, which anybody can reach without a guide. From there we passed through a roped off area, and started our climb. Folks not with a guided tour must stay below the 3000 m point, exploring nearby craters and features. Doing it on your own wouldn't be really all that bad either in terms of experience. You'd still get great views, just that you couldn't go to the crater. And, if you are feeling like a real workout, you can skip the funivia/bus altogether and walk from Rifugio Sapienza to the 3000 m point.

The crater summit hike takes you up to the central crater to see the Bocca Nuova and the Voragine. Your hike may be completely different due to conditions or that Etna may reconfigure itself between when this was written and when you visit. Etna has a habit of doing that. In fact, our hike started on lava from an eruption in December 2015, and during our tour our guide pointed out the many recent changes in the topography in the summit area.

We spent 30-45 minutes exploring the crater and then began our descent, continuing past the point where we were dropped off by bus (3000 m) to visit other recent craters below and freely accessible to folks not on our guided tour. The tour ended at the funivia upper station. In other words, we didn't take the bus back down. Along the way down, we paused for a lunch break. It wasn’t clear from the description on the web site that you should bring lunch, but common sense for a trip of 5-6 hours dictates you bring something to eat and drink.

Today’s hike to Etna's crater summit was 8.4 km (5.2 miles) in length, and was short as hikes go. But, what it lacks in length it makes up with stupendous views both of Mount Etna’s constantly-evolving, living landscape and the surrounding views over Sicily.

Left: Map showing three Mount Etna hikes we did. Center: Mount Etna south route - by the Gruppo Guide Alpine Etna Sud. Right: View from funivia (gondola) going up to start the hike.
Map showing three Etna hikes we tookMount Etna south route - by the Gruppo Guide Alpine Etna SudView from funivia (gondola) going up to start the hike

Group shots. Far left: At the start of the hike (after funivia and bus ride). Center left: Start of hike. Center right: Listening attentively to the guide. Right: Ice crystals at the crater - when we neared the crater, we put on helmets (provided as part of the tour).
At the start of the hike (after funivia and bus ride)Start of hikeListening attentively to the guideIce crystals at the crater - when we neared the crater, we put on helmets (provided as part of the ticket)

Clouds, lava and views from Mount Etna main crater.
Clouds, lava and views from Mount Etna main crater.Clouds, lava and views from Mount Etna main crater.
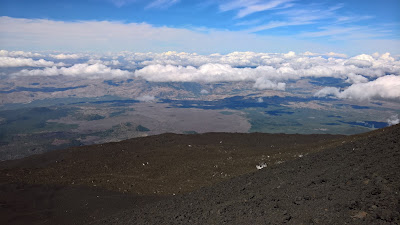
Main crater of Mount Etna, views we saw in the group tour.
Main crater of Mount Etna, views we saw in the group tour.Main crater of Mount Etna, views we saw in the group tour.

Left: On the way down, a view back to where we had come from. Right: Making our way down to the funivia top station.
Mount Etna - On the way down, a shot back to where we had come fromMount Etna - Making our way down to the funivia top station

Monday, September 19, 2016

Mount Etna North: Hike from Rifugio Brunek to Grotta del Gelo

Left: Route from Rifugio Brunek/Ragabo to Grotta del Gelo. Right: Spectacular views north to Nebrodi mountains.
Route from Rifugio Brunek/Ragabo to Grotta del Gelo Spectacular views north to Nebrodi mountains

Hike Notes

Length: 18.8 km (11.7 miles)
Duration: 7.5 hours roundtrip
Elevation: 982 m (3,220 feet) total elevation gain, max elevation 2.054 m (6,740 feet) @ Grotta del Gelo, starting elevation at Rifugio Ragabo 1.425 m (4,680 feet)
Location: Italy, Region of Sicilia, Province of Catania, Etna North, Piano Pernicana

Overview

This was our first hike after a few days in the Aeolian Islands and our climb to the summit of Stromboli. We were staying near Milo at B&B Dimora dell’Etna and it was an easy drive from there to the rifugio along the Strada Regionale Mareneve road. Rifugio Brunek and Ragabo are within a 100 yards of each other. We parked and started our walk from there, though later along the trail we saw another parking lot that mushroom collectors park at a gate, from which you can’t drive further (near Caserma Pitarrone).

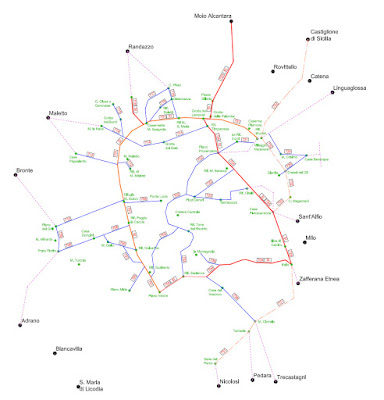
If you look at the pictures of the signs posted below, you'll see that you can make a bigger loop hike by passing through Piano Provenanza. We did not do that; instead, we came back the way we went. The tracks we followed to reach the grotta can be downloaded at the Etna Tracking site for La Grotta del Gelo. The first half to three-quarters of the trail are simple to follow as you are walking more or less on a service road. At the Grotta dei Lamponi, you depart the road and start following cairns, which is where the tracks come in handy. For an overview of trails around Etna, the Parco Etna site has some good overview images on their trails page. From Brunek/Ragabo you follow trail 701 and then at Grotta dei Lamponi you follow 724 for a bit to 714. You definitely need to study up before leaving because signage is a bit scant. Again, having the tracks on your phone to follow is easiest.

Along the way, we came across the Grotta delle Femmine, Grotta dei Lamponi, Grotta di Aci, and Grotta del Gelo. We explored only Lamponi and Gelo. We spent about 1 hour inside the Grotta dei Lamponi, with its two different galleries. It’s definitely worth a stop. It reminded us of our experience 6 years ago near Rainier in the Ape Cave Lava Tube. The Grotta del Gelo is unique in that the floor of the cave is a solid block of ice, which persists year-round, but is diminishing year over year due to warmer temperatures. We penetrated about 40 yards into the cave with normal hiking shoes. Beyond that, the ice floor of the cave sloped down in such a way that we weren’t convinced we could easily climb out, so we stopped there. The Etna Natura site has a themed page of the grotte you can see around Etna.

When exploring these caves, even just casually, bring good flashlights and head protection. Best would be a helmet of some sort, but at least have something on your head for protection. Lava is sharp.

Plants and Landscape

When I think of Etna, I think of fields of lava and little vegetation, let alone trees. Therefore, it was a surprise to start this hike in a lush pine forest. Yes, we eventually reached desolate (but beautiful) lava areas, but we were never far from forest. In fact, the trail passes through stands of pine and beech trees that seemed to have been spared destruction. Passing from the harsh beauty of lava to the soft beauty of forest is one of the attractions of this hike. We were equally surprised to run into groups of mushroom collectors, in particular porcini, in the woods.

Some of the plants that we noticed:

A good site for reading up on these plants in Italian is on the Flora e Vegetazione della Sicilia site. Here are the entries for Genistra aetnensis, Pinus nigra, and Juniperus communis ssp. hemisphaerica. For a sampling of orchids of Mount Etna, see Le Orchidee dell’Etna (2005).

Left: Grotta dei Lamponi. Right: Grotta del Gelo (ice floor lit up with concealed flashlight; note entrance in the distance).
Grotta dei LamponiGrotta del Gelo (ice lit up with concealed flashlight; note entrance in the distance)

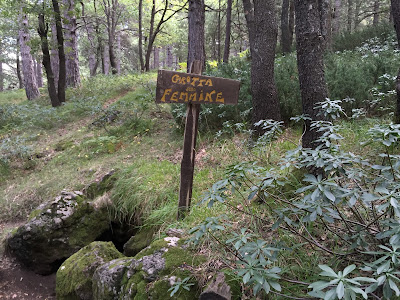
Left: Entrance to the Grotta delle Femmine. Right: Entrance to the Grotta del Gelo.
Entrance to the Grotta delle FemmineEntrance to the Grotta del Gelo

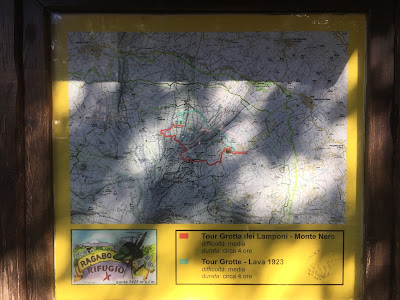
Far left: Map showing three hikes we did. Center left: A good overview map showing trail numbers and routes around Etna from the Parco dell'Etna site. Center right and far right: Signs at the start of the hike - Piano Pernicana. 
Map showing three hikes we did.A good overview map showing trail numbers and routes around Etna from the Parco dell'Etna site.Signs at the start of the hike - Piano PernicanaSigns at the start of the hike - Piano Pernicana

Left and center: Genista aetnensis – Mount Etna broom or la ginesta dell’Etna, which bears an uncanny resemblance to the Palo Verde tree of the American southwest. Right: Juniperus communis var. hemisphaerica.
Genista aetnensis – Mount Etna broom or la ginesta dell’EtnaGenista aetnensis – Mount Etna broom or la ginesta dell’EtnaJuniperus communis var. hemisphaerica

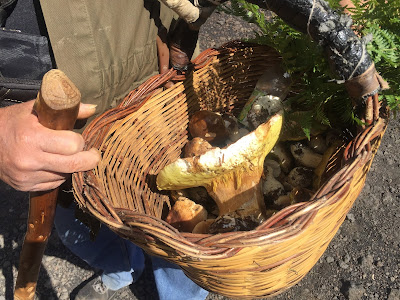
Left: We ran into a number of mushroom hunters on this hike. Porcini we think. Center: Neottia nidus-avis – Bird's nest orchid or il nido d’uccello. Right: Madonna of the Lava. There is always a shrine somewhere along the trail, you only need look.
We ran into a number of mushroom hunters on this hike. Porcini we think. Neottia nidus-avis – Bird's nest orchid or il nido d’uccelloMadonna of the Lava. There is always a little shrine somewhere along the trail, you only need look.

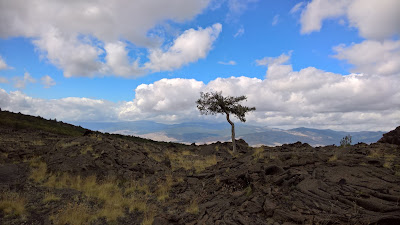
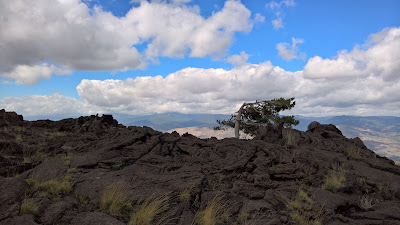
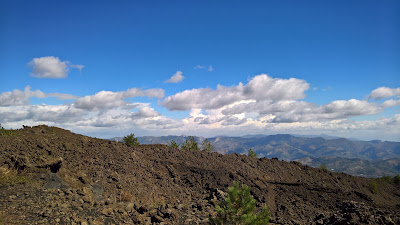
North slope of Mount Etna - surreal landscapes looking north. Lava, lone pines, and beautiful sky.
North slope of Mount Etna - surreal landscapes looking north. Lava, lone pines, and beautiful sky.North slope of Mount Etna - surreal landscapes looking north. Lava, lone pines, and beautiful sky.

Views north from the north side of Mount Etna. In center photo, Taormina is barely visible in the distance.
Views north from the north side of Mount Etna.Views north from the north side of Mount Etna, Taormina is barely visible in the distance.Views north from the north side of Mount Etna.

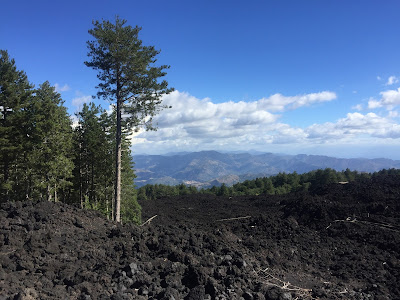
Left: Start of the hike under large pine trees. Right: Stands of forest give way to lava flows that laid waste to all that was there.
Start of the hike under large pine treesStands of forest give way to lava flows that laid waste to all that was there.

Friday, September 16, 2016

A Hike on the Island of Stromboli – To the Summit via the Ginostra Route

Left: Hike route from Ginostra to the summit and back to Stromboli town. Right: Craters of Stromboli volcano just before sunset.
Hike route from Ginostra to the summit and back to Stromboli town.Craters of Stromboli volcano just before sunset.

Hike notes

Length: 8.8 km
Duration: 6 hours (started at 3 pm in Stromboli and took a boat to Ginostra; returned to Stromboli at 9 pm)
Elevation: 1.100 m gain/loss, starting at sea level we reached about 926 m.
Location: Italy, Region of Sicilia, Province of Messina, Stromboli

Imagination and movies

The island of Stromboli has always held sway over my imagination ever since I first heard its name 25 years ago. Who knows why these things stick in your mind, a mix of half-truth and half-fantasy, and a need to imagine a place - exotic, black lava, and with an unruly volcano will due nicely thank you - to take you out of your own dull existence.  What's not to like about Stromboli, a volcano with civilization clinging to its edges. After all these years of Stromboli being in my mind and on my list of places to go, I can say that our visit didn’t disappoint. I would go back if the opportunity arose.

I’ve never seen the movie Stromboli, terra di Dio (1950), which everyone asks when you say are your going or you went to Stromboli. After this trip, I’ve taken to nodding my head and saying yes to the question, figuring that a good understanding of the plot and two days on Stromboli counts as equivalent to watching the movie, no?

On the subject of movies, we saw an interesting exhibit inside the Chiesa dell' Immacolata (Castello di Lipari) titled “Lipari 1952 – Viaggio nelle cave di pietra pumice - photographs by Cecilia Mangino” running from July 28 to September 10, 2016. The exhibit focused on 50 photographs taken during the summer of 1952 in the pumice quarry of Lipari. Along the edges of the exhibit, there were large posters from movies involving the Aeolian Islands, including:


Enough about movies and imagination, tell me about the hike


Okay, the hike to the top of Stromboli to see the volcano in action is the main focus for most visitors to Stromboli, as it was for us. We spent two nights (one and half days) on the island. It would have been nice to have had at least one more full day, if not two, to explore the Sciara del Fuoco on our own by hiking up to the panoramic point on the north side of the sciara, which you can do without a guide (up to 400 m). It would have been nice to explore the town some more, as well as explore more swimming options like the Spiaggetta di Adelaide, which we found on the morning of our hike.

Views of Ginostra. Left: Looking back from the trail as we leave Ginostra through prickly pear (fica d'India) patch. Center: Ginostra port. Right: Looking down at Ginostra and its solar panels.
Looking back from the trail as we leave Ginostra through prickly pear (fica d'India) patch.Ginostra port.Looking down at Ginostra and its solar panels.

Stop rambling, details on the hike please!

Okay, we ended up going with Magmatrek. We wanted to hike to the summit from Ginostra (via Punta d’u Cuorvu), because it was billed as a new route and less traveled. We found a detailed itinerary on the Volcano Adventures site, where we filled out the inquiry form. Somewhere along the line the tour was subcontracted to Magmatrek. I suppose you could just contact Magmatrek directly. All through the process, everything was handled professionally. We booked a few months in advance. One further point: we booked a private tour, just us and the guide. It’s more expensive, but the attention was more personal and, for us, more enjoyable. We met our guide at the Magmatrek office and took the boat with him to Ginostra.

Was the hike hard?

The climb from Ginostra to the summit was steep, and we worked up a good sweat for sure, but I wouldn’t say it was that hard. I’d say – on the theme of volcanoes hikes – the climb to the rim of Mount St Helens we did back in 2010 was harder. But don't worry, the guides for Stromboli are accustomed to pacing the hike with pauses, explanations, and time for photos.

A good map and overview of the island is: "Discovering the island of Stromboli" by Vincenzo Moreno & Denis P. Demoriane shown below.

Views on the way up. Route follows the edge of Sciara del Fuoco, shown on right.


Did you see anything at the top?

Why yes we did. We arrived at the top (Pizzo) around 6:40 pm with a sunset at 7:05 pm. From the Pizzo we looked northwest over the craters, and were treated to small eruptions every 15 minutes or so. It was worth the hike up. Your mileage may vary: you may get to the top and see way more or possibly nothing. It’s the journey, not the destination, right?

We started back down around 8:00 pm and arrived back at Stromboli (town) around 9:15 pm.

What was it like coming down at night?

We had a full moon or very close to it with exceptionally clear weather, so we started down with flashlights and then switched them off. In the moonlight, we giant-stepped/slid down the black sandy trail. It was a cross between skating and skiing, a beautiful sensation sliding our way down by moonlight. The light of the moon reflected off the ocean and the lights of Stromboli beckoned us in the distance.

Everyone takes the same route down, and flashlights are usually kept on at all times. Since we were in a small group (2 of us and our guide) we could play around a bit. At some point, we hit vegetation* and we switched our flashlights on. The sliding part was over and we finished our way down through normal trails, albeit very dusty, so we put on some dust masks (provided).

Tell me a vegetation* story…

The vegetation we encountered on the hike down was mostly the cane grass Saccharum spontaneum ssp. aegyptiacum (la canna d’Egitto). We saw an old photo – maybe in the museum in Lipari – showing very neatly cultivated areas, Malvasia grapes, delineated by this grass, on the slopes above the town of Stromboli. The photo we saw was likely taken before the destructive 1930 eruption, after which people left the island and cultivation was abandoned.

Left: Descending at night from Stromboli, walking through cane grass Saccharum spontaneum ssp. aegyptiacum. Center: Just above Ginostra at the start of the hike, walking through tall grass. Right: View of Stromboli volcano the morning of the hike. Note the cane grass on the lower to mid levels of slope - same area as in the left photo.
Descending at night from Stromboli, walking through cane grass Saccharum spontaneum ssp. aegyptiacum.Just above Ginostra at the start of the hike, walking through tall grass.View of Stromboli volcano the morning of the hike. Note the cane grass on the lower to mid levels of slope - same area as in left photo.


The comune of Lipari (of which Stromboli is part) has this to say of the grass (with our translation following):
Questa graminacea era stata un tempo introdotta dai contadini per essere utilizzata come frangivento e per delimitare i confini dei vignei. Con il declino dell'agricoltura, il Saccharum aegyptiacum ha colonizzato rapidamente i vecchi terrazzamenti, e oggi si arrampica dai pianori retrostanti l'abitato fino a quote comprese tra 200 e 350 m s.l.m., lungo le pendici del vulcano. 
This Graminacea had once been introduced by farmers for use as windbreaks and to delimit the boundaries of vineyards. With the decline of agriculture, the Saccharum aegyptiacum rapidly colonized the old terraces, and now extends from the plains behind the town up to altitudes between 200 and 350 m above sea level, along the slopes of the volcano.

La Sirenetta Park Hotel has this to say of the grass (with our translation following):

Nel corso degli ultimi 3.500 anni, infatti, la presenza antropica ha determinato sostanziali cambiamenti nell'originaria struttura e composizione della flora, della vegetazione e della fauna: ciò si è verificato dapprima attraverso lungo un processo di domesticazione del territorio, rendendolo adatto allo sfruttamento agricolo, e in seguito con l'abbandono delle colture. I canneti che occupano la fascia basale dello Stromboli e che si spingono fino a 400-500 m di quota si sono infatti diffusi a partire dall'eruzione del 1930, quando anche gli ultimi vigneti vennero abbandonati e una larga parte della comunità lasciò l'isola alla volta delle Americhe e, soprattutto, dell'Australia; la canna d'Egitto (Saccharum spontaneum ssp. aegyptiacum), come suggerisce il nome, era stata introdotta per creare barriere frangivento e delimitare i poderi.

Over the last 3,500 years, in fact, the human presence has brought substantial changes in the original structure and composition of flora, vegetation and fauna: first occurring through a long process of domestication of the territory, making it fit for agricultural use, and later with the abandonment of crops. The reeds that occupy the lower slopes of Stromboli and extend up to 400-500 m above sea level became widespread after the eruption of 1930, when even the last vineyards were abandoned, and a large part of the community left the island to the Americas, and especially Australia; the reed of Egypt (Saccharum spontaneum ssp. aegyptiacum), as the name suggests, had been introduced to create windbreaks and delimit farms.

For a general overview of the flora and fauna on Stromboli, see the Italian Botanical Heritage site for the Isolie Eolie.

The Sciara del Fuoco and rocks and debris sliding down it.The Sciara del Fuoco and rocks and debris sliding down it.The Sciara del Fuoco and rocks and debris sliding down it.

Stromboli crater photos from just before sunset until after.Stromboli crater photos from just before sunset until after.Stromboli crater photos from just before sunset until after.
Stromboli crater photos from just before sunset until after.Stromboli crater photos from just before sunset until after.

Stromboli "fossetta" - valley of the moon is what our guide called it. 
Stromboli "fossetta" - valley of the moon is what our guide called it. Stromboli "fossetta" - valley of the moon is what our guide called it.

Left: Stromboli "fossetta" - with peak (pizzo) in the distance. Right: View south toward the other Aeolian Islands.
Stromboli "fossetta" - with peak (pizzo) in the distance.View south toward the other Aeolian Islands.

Left: Last bit of climb to pizzo, our viewing spot over the craters. Right: View of Vancori Complex.
Last bit of climb to pizzo, our viewing spot over the craters.View of Vancori Complex.

Maps of Stromboli. Left and center: Stromboli Excursions map by Vincenzo Moreno & Denis P. Demoriane. Right: A typical billboard in Stromboli advertising a tour (giro) around the island.
Stromboli Excursions map by Vincenzo Moreno & Denis P. Demoriane.Stromboli Excursions map by Vincenzo Moreno & Denis P. Demoriane.A typical billboard in Stromboli advertising a tour (giro) around the island.