Overview ~ Base ~ Eating ~ Tips ~ Itinerary
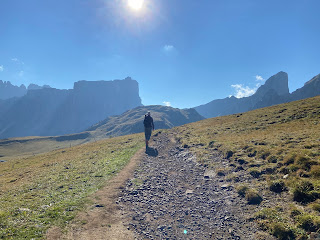
Top left: The path leading to Rifugio Biella and the formation called Croda del Becco.
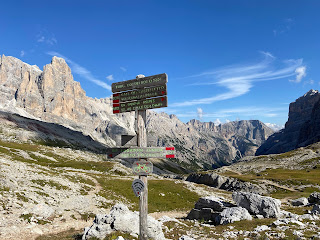
Top right: Horses at Passo Giau and the Lastoni di Formin in the distance.
Bottom left: Tre Cime di Lavaredo from the north side.
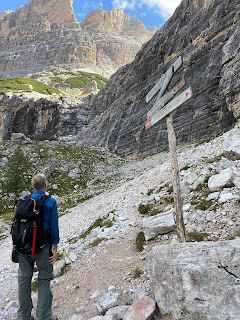
Bottom right: At the base of Tofana di Rozes on trail 404, near Rifugio Dibona.
Overview
As the title says, we hit 100 kilometers in six hikes, done in six days consecutively. Actually, it was 103 kilometers (64 miles) and about 6.2 km (3.9 miles) climbed. All that walking left us with a good feeling for the area and this part of the Dolomites. And, we feel like we got our Alta Via 1 fix for now as some of our hikes took us on trails we would have walked on and rifugi we would have stayed in. See the Itinerary section for a list of the hikes.
Here are our past posts on the Dolomites:
2008: Hiking: Alta Badia and Val Gardena – Eight Hikes in the Dolomites
2008: Dining: Maso Runch – Hof, Pedraces
2008: Lodging: Colfosco Bed and Breakfast Hotel – Nature Hotel Delta
2016: Skiing: Alta Badia Dolomites Weekend and Skiing the Sellaronda
2016: Hiking: A Short Hike from Colfosco to Jimmy Hütte
2017: Skiing: The Sellaronda - The Sequel
2018: Dining: Dining Recommendations for Alta Badia in the Dolomites, South Tyrol
2018: Six Days in Val Badia – Dolomites: Hiking, Walking, and Dining
Base
We based ourselves in Cortina d'Ampezzo, a famous mountain village situated in the wide Ampezzo valley. Cortina, already famous with upper-class Italians before hosting the Olympics in 1956, became internationally famous afterward. Walking the streets of Cortina and sharing tables in rifugi, we heard a mix of languages to confirm its draw is really international.
For two of our six hikes we left the car parked and walked or used public transportation. For our other four hikes, we drove under <30 minutes to reach trailheads. But this was by choice. You can easily be based in Cortina and do a lot of hikes without a car. There are a lot of low-altitude walks available righ from town, or access to gondolas which take up up higher.
After studying the situation and judging from our past experience (and pleasure) lodging above Colfosco with a view down into the town, we chose a hotel not in the center of Cortina but a little higher up the hill. That worked out well for us because the view back toward the mountains over a gin tonic was worth it. We stayed at the Boutique Hotel Villa Blu, though there are many choices in a similar situation. The center was 15 minutes walking on a bike path.
We would recommend staying on the east hills above Cortina because there seemed to be less traffic on the SR48 going and coming over Passo Tre Croci. In contrast, the SR48 traversing the hills west of Cortina always seemed busier with vehicles going back and forth to either Passo Falzarego or Passo Giau.
In Cortina, there are three museums: Mario Rimoldi Modern Art Museum, Museo Paleontologico "Rinaldo Zardini", and Museo Etnografico Regole d'Ampezzo. These make for a great "rest" or "rainy" day activity. We went to the Mario Rimoldi Museum and spent about one hour looking at a current exhibition (Paesaggi d'Italia) and the permanent collection. We liked the collection, which is modern art, covering works generally from 1860 to 1970s. (It turns out we just couldn't rest that much and ended up skipping the other two museums and hiking in the afternoon.)


Left to right: An overview of all the hikes we did centered around Cortina d'Ampezzo. Maps we used during our time in Cortina. Two informational signs about alpine flowers.
Eating
During our hiking week, we ate breakfast at our hotel, lunch at a rifugio, and dinner either at a hotel or a restaurant in Cortina. The one exception was a dinner at Ristorante Cianzia in Borca di Cadore, south of Cortina, which was an Osteria d'Italia pick. We ate twice in our hotel's restaurant, Amadeus Ristorante by "Nero di Seppia", which was good if not a little pricey. And, we ate twice at Dolom'eats all'Aquila, which we found warranted it's high review score. Good food and preparations.
Bring enough cash to pay for meals in rifugi in case they don't accept electronic payment, which is common. The following photos show some of the meals we had at rifugi.
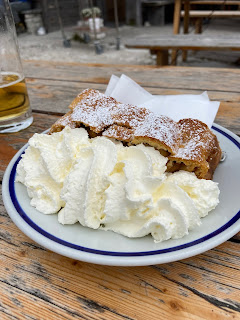
Rifugio food. Left: Three types of canederli and polenta at Rifugio Pian di Cengia. Center left: Strudel at Rifugio di Cengia. Center: A drink and a strudel at Rifugio Sennes. Center right: Lunch at Rifugio Biella. Right: The menu at Rifugio Biella.

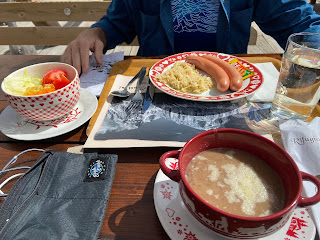
Rifugio food. Left: Canederli at Rifugio Croda da Lago. Center left: Soup and wurstel at Rifugio Giussani. Center: Strudel at Rifugio Giussani. Center right: Pasta at Rifugio Mietres. Right: Sandwiches without crusts at a bistrot at Passo Tre Croce.
Tips
You can just show up and ask the front desk of your hotel what to do. They will size you up and probably give you some good suggestions, sort of the greatest hits: take the gondola up to Faloria, take the gondola up to Tofana di Mezzo, take the bus to Tre Cime di Lavaredo, etc.
These are all fine suggestions, but if you want to tailor your hike to what you want, you need to do a little research to understand the trails and what you are getting into. Here are some resources we used (be sure to set language to EN when available):
- Dolomiti.org – We used this site extensively to get a feel for some of the possible hikes (see experiences section). Once we found hikes that looked good, we double checked elevations and routes with other sites, resources and other mapping apps like Open Street Map.
- Itinerari di Montagna – Many of the hikes on this site were above our grade, but it's good to check and see what may be too "hard" for what you are thinking about doing. Look at the pictures for clues. For example, we considered going to Lago di Sorapis via trail 213/216 as an alternative to the busy trail 215 but after looking at the details here, decided it was too much for us.
- Parco Naturale delle Dolomiti d'Ampezzo – Provides an overview of the park of the Dolomites of Ampezzo. Pick an area and you can find info about flora and vegetation, fauan and habitat and itineraries.
- Cortina Skiworld – Like many of these suggested websites, you have to go through lots of fluff to find ideas. For this site, the list of lifts and their opening times in summer is useful.
- CAI Veneto site – It should be more useful, but it isn't. We didn't find good trail information. Check this site for any trail warnings. By contrast, CAI Bergamo has maps and details of trails.
- Cicerone books on the Dolomites – We've found these books to be useful and well-written.
- OpenStreetMap – This collaborative mapping project's maps are good for planning and contain main popular hiking trails. The app we typically use on our phones that leverages OpenStreetMap is Maps.Me, which is good. (Though, we notices lately as they try to "monetize" the data, the app is getting clunkier and less reliable.)
- Physical maps such as the widely used Tabacco 1:25.000 maps. For example, here is the map for Cortina d'Ampezzo e Dolomiti Ampezzane. (There is also an app for Tabacco maps, but we haven't tried it.)
Tip 2: When planning a hike, always check the information given by the rifugi on the way. Usually, they have good descriptions on how to reach them and their dates of operation. For example, for this hike, we visited Rifugio Vandelli, Rifugio Croda da Lago, Rifugio Auronzo, Rifugio Biella, Rifugio Sennes, Rifugio Mietres, Rifugio Faloria, and Pian di Cengia.
Rifugio Biella – Seekofel Hütte
Rifugio Sennes – Sennes Hütte
Rifugio Locatelli – Dreizinnenhütte (Drei Zinnen is "three merlons" in German, referring to the three peaks)
Malga Langalm – Langalmhütte
Rifugio Lavaredo – Lavaredo Hütte
Rifugio Pian di Cengia – Büllelejoch-Hütte
Tip 4: When working out the details of a hike, keep in mind that some of the hike could be on gravel roads. This in itself may not be bad, but it depends on the context. A scenic gravel road gently winding through a pasture is nice. A steep logging road (gravel) is not that nice. In fact, we walked on a few forest roads and they are tiring and kind of boring. On maps, if the trail line ends and looks like it goes onto a "strada forestale" maybe you don't want that if there is a nicer way to get where you want to go.
The overall map we used (also see photo in this post) had 4 indicators – as an example – easy trail (solid line), difficult trail (dashed line), expert trail (dotted line), and via ferrata (line with crosses). (The map you use may be different!) We were generally hiking on easy, difficult and expert trails. Via ferrata requires the correct equipment, which we don't have. Only once – on the Lago di Sorapis hike – were there cables that were labeled as via ferrata but didn't require equipment, just steady nerves.
The point is that you may encounter a variety of trail types on one hike. Take for example our clockwise walk around Tofana di Rozes. We started and ended at Rifugio Dibona. We started on a difficult trail, continued on a easy trail, went back to a difficult trail, which then turned into an expert trail. The expert part was trail 403 climbing up to Rifugio Camillo Giussani and it was hard.
Tip 6: Study the maps the night before and understand topo lines and elevation gains. Mapping apps on phones used on the fly are useful to a point but they aren't a substitute for good planning. Knowing the trail numbers ahead of time and the names (Italian and German) of your destinations will make the hike less stressful. Also, trying to read isolines on a phone screen in bright light under pressure is not fun at all.
The number of people we experienced was high on Tre Cime and Lago Sorapis hikes, two very popular hikes. On our other four hikes, we saw much less people traffic. Our motto became "more cows than people means a good hike".
What to do with lots of people on the trail?
- Be okay with that many people.
- Go early or go later in the day.
- Go as early or late in the season as you can. We like eating at a rifugio, so seasonal closing times for a rifugio along a trail can be a limiting factor. Also, we like eating lunch at a rifugio more or less around lunch time, so of course doing so means you encounter people. If you pack all your own food, this gives you more flexibility.
- Remember trail etiquette. Smile, don't block the trail for faster hikers, and keep your patience.
Tip 8: Watch the weather forecasts but don't let them dictate what you do or don't do. During our mid-September stay was had several days with forecasts saying 20 – 50% rain, which never came. In fact the days were gorgeous and perfect hiking days. Lucky maybe. The point is, don't let weather forecasts stop you but carry proper gear and have a plan B for cutting short a hike in the event of bad weather.
Tip 9: Check the bus schedule to see if the bus can get your there and take you back without driving. The bus service to and from Cortina seems top notch and punctual. For example, from Cortina, you can get to many popular places easily such as Passo Giau, Passo Falzerego, and Pass Tre Croci.
Tip 10: Assuming you arrive by car, consider setting aside a good part of the day coming and going to visit sites along the way. We drove from Bergamo, and the typical and quickest way to arrive is going from Bergamo – Brescia – Verona – Vicenza – Padua – Treviso – Cortina. On the way to Cortina, we instead took a longer route and came through the Valdobbiadene region (UNESCO), ate a nice trattoria and visited the prosecco maker, Marsuret. On the way back, we stopped at the charming town of Bassano del Grappa, ate, and visited a grappa museum. On the way up we also stopped at the fascinating landmark Brion Cemetery, designed by the Italian architect Carlos Scarpa.
Ideas for a stop in Valdobbiadene. Left and center left: Brion Cemetery and tomb designed by Carlos Scarpa. Center, center right, and right: Photos from the Maruset Winery.


Ideas for stop in Bassano del Grappa. Left: "The Kiss" statue. Center: The Poli Grappa Museum and glassware. Right: The Ponte Vecchio of Bassano del Grappa.
Itinerary
Day 1: Tre Cime Lavaredo
Overview
Date: 2021-09-08
Total distance: 26 km (16 miles)
Elevation gain: 1.549 m (5,082 feet)
Notes
We drove from Cortina and parked at Lago d'Antorno in the free parking lot. At Lago d'Antorno, there is the last free parking before you have to pay to continue on the road and park at Rifugio Auronzo. We had planned to park at Rifugio Auronzo but the traffic to pay (as a single vehicle) was backed up and not moving. So we exited the line, parked, and walked up to Rifugio Auronzo, an effort in itself with about 450 m to climb. The climb (and descent) from Auronzo also accounts for the longer length of this hike.
Most hikers and visitors take a bus up to Auronzo – which costs the price of the bus ticket which is much less than paying for a single vechicle at 30 euros, at time of writing. There are buses that leave directly from Cortina (and other spots) and bring you to Rifugio Auronzo. All you do is show up and the bus takes you there, which accounts for why these trails are so popular.
Once we reached Auronzo on foot, we followed a counter-clockwise route to Rifugio Lavaredo. At Rifugio Lavaredo, most hikers go to Forcella Lavaredo and on to Rifugio Locatelli. We instead continued on to Lago di Cengia, Forcella Pian di Cengia, and Rifugio Pian di Cengia. We had lunch at Rifugio Pian di Cengia and then continuing still counter-clockwise to Rifugio Locatelli, Malga Langalm and then finally back to Rifugio Auronzo.
How to do the first part of the hike is explained on the Rifugio Pian di Cengia site.
Next time: go even earlier. We started hiking from Lago d'Antorno around 9:20 am. Would start at 8:00 am next time to avoid the traffic and people.

Left: Overview of the hike. Center left: Signs pointing to Pian di Cengia. Center: Approaching Lago di Cengia. Center right: A stretch of trail leading to Rifugio Pian di Cengia. Right: View of Rifugio Pian di Cengia.


Left: 'Laghi dei piani' near Rifugio Locatelli. Center left: Rifugio Locatelli. Center right: View of Tre Cime di Lavaredo from the north. Right: Walking past Tre Cime di Lavaredo.

Left: Tre Cime di Lavaredo from the north side. Center: View south from the trail near Rifugio Auronzo in late afternoon. Right: Reflections on Lago d'Antorno - site of last free parking.
Day 2: Ra Stua to Rifugio Sennes and Rifugio Biella
Overview
Date: 2021-09-09
Total distance: 16 km (10 miles)
Elevation gain: 1.030 m (3,379 feet)
Notes
After the hike around Tre Cime the day before, the hike to Sennes and Biella was a welcome relief as there were very few people! More cows than people = a good hike.
This hike starts at Malga Ra Stua. We drove there and parked, which isn't possible in high season (July – August, check the Ra Stua website). In high season, you take a bus. From Malga Ra Stua, you start hiking slightly up hill and then steeply (on a gravel road) until you reach Rifugio Sennes. After Rifugio Sennes, you are on a real trail. The next stop is Rifugio Biella where we ate lunch. The best part of the hike is between Rifugio Sennes and Rifugio Biella along trail 6, and from Rifugio Biella back to Ra Stua along trail 26. The views were spectacular views and the south side of Croda del Becco. In German, the mountain is called Seekofel, meaning peak on the lake with the lake being Lago di Braes to the north.
How to do this hike is explained on the Dolomiti.Org site.
Next time: The first part of the hike is up a gravel forest road and if we were to do it again, we would take trail 9 to Rifugio Fodara Vedla first and then continue on to Rifugio Sennes, to avoid the steep forest road. Live and learn.


Left: Overview of the hike. Center left: Starting out near Ra Stua and heading north. Center right: Laghi Fosses along trail 26. Right: On trail 26 descending down to Ra Stua.


Day 3: Passo Giau to Croda da Lago
Overview
Date: 2021-09-10
Total distance: 22.4 km (13.9 miles)
Elevation gain: 781 m (2,562 feet)
Notes
We took Dolmiti Bus from Cortina to the Passo Giau to start this hike. We took the bus so we could leave the car at the hotel and walk back to Cortina.
Our inspiration for doing this hike goes back to June 2008. At that time, we took a photo of a mountain group we saw from Cinque Torre and were thoroughly intrigued by it (see Alta Badia and Val Gardena – Eight Hikes in the Dolomites). For years, the photo would come up as a background on our computers and we would stop and remember that day. We took yet another photo of the same mountain group in July 2020 (see A Hiking Week in the Dolomites, Val Badia and Val Gardena), but from Passo Giau.
That mountain group is called "I Lastoni di Formin". Lastoni derives from the local (Cadorino) dialect word "lastoi", which refers to a large plateau sloping down toward the north, characterized by terracing and rocky slabs covered with gravel and debris. The view of this mountain group from Passo Giau is actually two ranges, the range closest to Passo Giau has the high point of Cima or Punta dei Lastoi (2.657 m) while the range behind it has the high point of Croda da Lago (2.715 m).
Starting from Passo Giau, we connected up to trail 436 just before Forcella di Giau (2.370 m). We took trail 436 to Forcella Ambrizzola (2.277 m) to trail 434, which takes you down to Lago Federa and Rifugio Croda da Lago – Gianni Palmieri. At Rifugio Croda da Lago is where we had lunch and then continued on back to Cortina.
The word croda means crag, specifically in the Veneto region it's one made of dolomite with sharp walls and edges. In a group of crags, such as the Tre Cima di Lavaredo, the crags are separated by steep gullies.
On trail 436 on the south side of the mountain range, you are in a high plateau that is otherworldly but strangely devoid of interesting plants. It turns out this area has never been useful for grazing as we read. All the stranger is that just off of trail 436 – and not to be missed – is a huge boulder where in 1987 a Mesolithic burial was found, dubbed the skeleton of Mondeval Man. Look for a the signs pointing to the site. It's about a 5 minute deviation from trail 436.
This hike is discussed on Dolomiti.org.
Next time: From trail 436 heading toward Lago Fedèra (Rifugio Croda da Lago), just before reaching Forcella Ambrizola, we would take trail 435 into the middle of I Lastoni di Formin, passing over Forcella de Formin (2.462 m).


Left: I Lastoni di Formin - from Passo Giau. Center left: The trail leading to Forcella di Giau. Center right: View north toward Tofana di Rozes. Right: View from Mondevàl de Sora toward Monte Pelmo.

Left: The surreal landscape on trail 436 heading toward Forcella Ambrizola. Center: View from Forcella Ambrizzola toward Rifugio Caroda da Lago and Cortina d'Ampezzo in the distance. Right: Heading to Forcella Ambrizola.


Left: Mondevàl de Sora on trail 436. Center left and center right: South side of rock where Mondeval Man was found. Right: North side of the rock.
Day 4: Walk around Tofana di Rozes
Overview
Total distance: 13.5 km (8.4 miles)
Elevation gain: 1.116 m (3,661 feet)
Notes
For our fourth hike, we drove to Rifugio Dibona and parked. From Dibona head west at the base of the mighty Tofana di Rozes (3.225 m) on trail 404. At Forcella Col dei Bòs, continue north on 404. Head for the Scala d. Minighèl (a via ferrata) but continue pass that following the signs for "facile" or easy trail and connect up to trail 403, which will take up up to Rifugio Camillo Giussani. Trail 403 leading up to the Rifugio is steep and some parts shown as "expert" on some maps. It's anything but "facile".
There are a lot of via ferrata paths splitting off from the main route outlined here that you shouldn't try unless you have the equipment and experience. For example, here is the "easy" track we took and here's the via ferrata track. Just looking at the pictures of the via ferrata track makes our palms sweat.
The part of the hike from Rifugio Giussani back down to Rifugio Dibona is short, has great views south, but is ultimately just a big wide gravel road, that is, it's not that interesting as a trail.

Left: Overview map showing hike around Tofana di Rozes. Center left: Starting out on trail 404 heading west. Center right: At Forcella dei Bos, at the top of Val Travenanzes. Right: View north down Val Travenanzes.

Left: Sign marking 'easy' trail 403 for reaching Rifugio Giussani. Center left: Part of trail 403 with Val Travenanzes below. Center: A steep part of trail 403. Center right: A long slog up to Rifugio Giussani on trail 403. Right: A sign saying that Rifugio Giussani is open, thankfully.
Left: Rifugio Cantore and Refuge Tofana. Right: The trail from Rifugio Giussani down to Rifugio Dibona - a wide track.
Day 5: Walk up to Rifugio Faloria (via Rifugio Mietres)
Overview
Date: 2021-09-12
Total distance: 10.1 km (6.3 miles)
Elevation gain: 1.052 m (3,451 feet)
Notes
Today is Sunday and it was supposed to be our "rest" day. After visiting the modern art museum in Cortina in the morning, we though lunch in the hills above Cortina would be a fun idea. So we scurried back to the hotel, suited up for hiking and set off to find Rifugio Mietres above Cortina. It was a slog up but worth it. This was a case of having to walking up a steep forest road (dirt, gravel) that was okay, but not that much fun. See Tip 4 above.
During lunch, we stared at Rifugio Faloria in the distance, the top of the Cortina d'Ampezzo – Mandres – Faloria gondola. We checked the time of last run of the gondola and decided we had enough time to walk up to Faloria and take the gondola down to Cortina.
After Rifugio Mietres, follow signs (trail 211) toward Rio Gere. Just after passing by the El Brite di Larieto, be sure to follow the path on the left through the forest (not the road). (Larieto is a forest of larch trees.) You end up at Rio Gere on SR48. Cross the street and look for the signs for Dolomieu Panoramic Trail. You can also just walk up the dirt road / ski run and reach the same point, but the trail is much nicer. Once you start climbing in earnest, you'll realize why most walkers take the Foloria gondola up Rifugio Faloria and walk down the Dolomieu trail!
The Dolomieu trail brings you right to Rifugio Faloria with the attached gondola station. You could also walk back down to Cortina at this point.

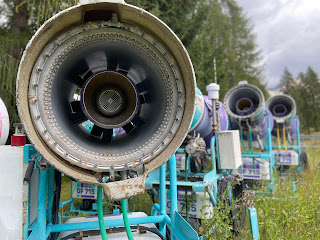


Left: The Dolomieu trail heading up to Rifugio Faloria. Center left: A sign describing the Dolomieu trail above Cortina d'Ampezzo. Center right: View from Dolomieu trail north toward Cristallo Group. Right: View north toward Cristallo Group with Monte Cristallo in shadow.
Day 6: Lago di Sorapis
Overview
Date: 2021-09-13
Total distance: 15.1 km (9.4 miles)
Elevation gain: 764 m (2,507 feet)
Notes
The standard way to do reach Lago di Sorapis is to go to Passo Tre Croci (car or bus) and follow trail 215 to the lake and Rifugio Vandelli. There is also another way, as described here (using trails 213 and 216) that looks to be harder. We decided that we would take 215 to the lake and then return on 217 and 209 back to Passo Tre Croce. There are many ways to reach the lake, here's one that is a complete day starting and ending in Cortina.
Trail 215 has a number spots equipped with cables (to grab on to), metal steps imbedded into rock, and a few cases metal stair cases where there used to be trail. It can be a bit challenging for those with vertigo.
Because we arrived so early at Rifugio Vandelli (around 10:30 am) we didn't eat lunch and instead continued on to trail 217, which was steep drop down to the valley. Trail 217 dumps you out on a forest road and it's a slog to regain all the elevation lost to get back to Passo Tre Croci.
Just off of trail 209 and just before reaching passo Tre Croce, we came across a WWII military blockade, in Italian a "sbarramento". It turns out we found the Sbarramento Passo Tre Croci, opera #3. We went inside to take a look. (Here's a video showing the inside.)
Maybe because it was our last hike, or our route wasn't interesting (especially trail 217), or because the lake level was low and the lake less turquoise than we had seen in picture, or who knows what – this hike as our least favorite even though it is highly recommended.


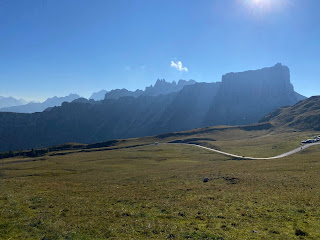
Left: Map showing a circuit route to Lago Sorapis. Center left: The Sorapiss Group surrounding the lake. Center right: Part of trail 215 with cables to hold on to. Right: Part of trail 215 with stairs where there was a trail.











No comments:
Post a Comment
All comments are moderated. If your comment doesn't appear right away, it was likely accepted. Check back in a day if you asked a question.